Archives de catégorie : Logiciels libres

Delete values from influxdb

Quick (and dirty) tip and script to remove unwanted or incorrect values from influxdb.
Precisely, this one removes all values above 50 fromArkteosreg3_exterieur_temp.

#!/bin/sh
influx -database 'openhab3_db' -host 'localhost' -port '8086' -username 'admin' -password '' -execute 'select * from Arkteosreg3_exterieur_temp where value > 50' | awk '{print $1;}' > /tmp/time.txt
while read -r line; do echo "$line";influx -database 'openhab3_db' -host 'localhost' -port '8086' -username 'admin' -password '' -execute "delete from Arkteosreg3_exterieur_temp where time=$line"; done < /tmp/time.txt


Wemos D1 simple OLED display for OpenHAB

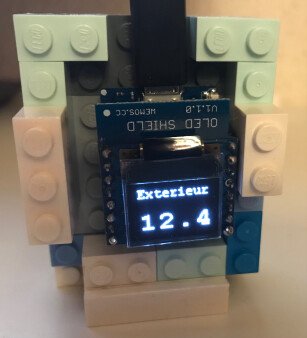
I managed to use an Wemos D1-mini and its OLED shield to create a mini-display for temperature, with (almost) no line of code.
Configuration is done once, and displayed information is entirely sent through MQTT.

Here’s a little tutorial:

  • Flash the D1 mini with Tasmota with tasmota-display.bin build
  • Perform the basic Tasmota setup (wifi, MQTT, …)
  • Connect the OLED shield on the D1 mini
  • Set the I2C pins :
    • Web interface / Configuration / Configure Module
    • D2 GPIO4 : I2C SDA
    • D1 GPIO5 : I2C SCL
  • Check the OLED shield is detected :
    22:11:45 CMD: i2cscan
    22:11:45 MQT: stat/esp01/RESULT = {"I2CScan":"Device(s) found at 0x3c"}
  • Configure the display settings through display commands :
    • DisplayModel 2 (SSD1306 ie OLED Shield)
    • DisplayWidth 64
    • DisplayHeight 48
    • DisplayMode 0
    • Optionally DisplayRotate 2 to display upside down
  • Finally, type use the Display command to check your display settings :
    {"Model":2,"Width":64,"Height":48,"Mode":0,"Dimmer":15,"Size":1,"Font":1,"Rotate":2,"Refresh":2,"Cols":[16,8],"Rows":2}}
  • Optionally “Configure timers” to turn display on/off on fixed times

The device is now ready to receive MQTT “display commands”.
I created the following rule :

rule "esp01publishtemp"
when
    Item HueSensor1Temperature received update
then
    val mqttActions = getActions("mqtt","mqtt:broker:mosquitto-nas")
    val esp01Temp = String.format("%2.1f",(newState as DecimalType).floatValue)
	logInfo("esp01.rules", "esp01publishtemp : newState=" + newState + " ,esp01Temp="+esp01Temp)
	mqttActions.publishMQTT("cmnd/esp01/displaytext","[Ozf1]Exterieur:[c1l2f2s2p-4]"+esp01Temp)
end

Explanations : When HueSensor1Temperature item is updated (no matter if it’s MQTT based or not) :

  • Format the payload with 1 decimal
  • Format the display :
    • [0zf1] : Turn the display on (0), clear it (z) and select font 1
    • Display the text for the first line (“Outside” in french here)
    • [c1l2f2s2p-4] : On column 1 (c1) and line 2 (l2), select font 2 (f2), scale factor 2 (s2) and pad 4 characters to the right (p-4)
    • Display the value
  • Send the MQTT payload to the moquitto-nas broker

At first, nothing will be displayed until the first MQTT update.

This page list all display possibilities with tasmota.

Enjoy !

Sonoff zigbee bridge with OpenHAB zigbee binding

This a copy of my post on the OpenHAB forums.

I wanted to start using zigbee at home, and I wanted it simple.

First, I bought Itead Sonoff Zigbee Bridge (SNZB or zbbridge) and flashed it with tasmota.
See https://notenoughtech.com/home-automation/flashing-tasmota-on-sonoff-zigbee-bridge or https://www.digiblur.com/2020/07/how-to-use-sonoff-zigbee-bridge-with.html (without soldering, but more HomeAssistant oriented).
It works fine, but I like items auto-discovery and don’t want to bother with magic-voodoo-json data extraction and formatting.
The article from digiblur shows native integration with HomeAssistant binding, and I’ve managed to achieve the same thing with OpenHAB.

So this is a litlle howto:

  • Read Digiblur’s article and strictly apply all steps, except the HA ones. The related video is also helpful.
    I uploaded the latest UART firmware (6.7.6), it seems you don’t have to stick to older 6.5.5 with OH
    A the end, you should be able to telnet to port 8888
  • Install socat, and bind your serial port to the zbbridge radio:
    socat -dd pty,link=/dev/ttyzbbridge,raw tcp:192.168.x.y:8888


    Of course, adjust the IP address to point the zbbridge one.

You can also specify owner and group with user-late and group-late to avoid permission issues :

socat -dd pty,link=/dev/ttyzbbridge,raw,user-late=openhab,group-late=dialout tcp:192.168.x.y:8888
  • Install serial binding in OH
    You must configure OH startup script to include `/dev/ttyzbbridge` as stated in the documentation
  • Install Zigbee binding in OH
  • Add a new Zigbee « Ember EM35x Coordinator » thing
    Just set the serial port to /dev/ttyzbbridge. I didn’t touch other settings since I was not sure of what they really do
  • Pair zigbee devices as stated on the zigbee binding documentation:
    Search for Zigbee things
    Put your device in pairing mode, it should appear.
    Wait for the discovery to finish (a name should appear, not « unknow zigbee device »
  • Enjoy !

I did this minutes ago, this is a basic procedure. I was able to pair Xiaomi plug, Aqara temp/hum and door sensors, and a Ikea Tradfri dimmer. Some of the devices don’t report battery status as zigbee2tasmota does.

  • There is room for a lot of enhancements, for example:
    Make socat a service with auto-reconnect
  • Fine-tune the zigbee coordinator settings

Finally, it would be great the the serial binding allows Serial-over-TCP connections as HA does with socket://<your bridge IP>:8888 as serial port path.

Lego Boost, Scratch Link & Dongle Bluetooth CSR

Quelques notes sur ma tentative de connecter Scratch Desktop 3 à un ensemble Lego Boost…

Bluetooth 4.0 requis

Le « Move Hub » communique via BLE qui est une variante de la norme Bluetooth 4. Une puce compatible est donc requise, ce qui n’est indiqué nulle part, à part dans l’extrait d’un livre aux éditions ENI

Facile…

Mon vieux portable étant limité au Bluetooth 2.0, j’ai donc acheté un dongle USB à pas cher, basé sur un chipset CSR8510. Le mien est de marque Yizhet, il existe des modèles chez Trust, Belkin, Bluetake, Konig, … basés sur le même chipset.

Malheureusement, quand je l’ai connecté au PC, Windows 10 l’a bien reconnu, et il est apparu dans le gestionnaire de périphériques en tant que « Generic Bluetooh Radio » (IDs USB 0A12:0001) avec une erreur 10 « le périphérique n’a pas pu démarrer ».

J’insère alors le CD fourni dans le lecteur à la recherche d’un pilote, et je lance l’unique setup.exe présent sur la galette, qui procède à l’installation de « CSR Harmony Wireless Stack », qui est une pile bluetooth complète parallèle à celle de Windows 10. Avec un style Windows 7, elle semble être basée sur la suite BlueSoleil qui complétait le manque de fonctionnalité bluetooth des anciennes versions de Windows. Moche mais fonctionnelle, elle détecte bien le « Move Hub » en BLE quand je fais une recherche de périphérique.

… mais pas trop

Par contre Scratch ne détecte pas le périphérique. Scratch Link étant très peu verbeux, je n’ai pas d’explication sur ce comportement, mais je suppose qu’il se base d’abord (ou uniquement) sur la pile Bluetooth native de Windows 10.

J’essaie alors de trouver un pilote générique Windows 10 pour ce périphérique (somme toute très générique lui aussi), sans succès : Je ne trouve que des pilotes qui ont le même comportement, ou alors la suite CRS Harmony complète. CSR (Cambridge Silicon Radio) ayant été rachetée par Qualcomm en 2015, il n’y a pas d’information sur le nouveau site web.

Je tente alors diverses combinaisons avant de tomber sur une page web qui indique que Windows ne sait gérer qu’un seul récepteur Bluetooth à la fois ! Je désactive le récepteur intégré au PC (sobrement nommé « Generic Bluetooth Adapter » dans le gestionnaire de périphériques), je rebranche le dongle USB et, magie, il démarre correctement ce coup-ci.

Une recherche de périphériques Bluetooth via le panneau de configuration Windows 10 m’indique que la détection fonctionne correctement (il ne faut pas l’associer, juste vérifier qu’il apparaisse bien).

Scratch récent requis également

Autre point découvert récemment : Lego diffuse un nouveau firmware 2.x pour le Move Hub, qui casse la compatibilité avec l’ancienne API et génère un comportement incorrect.

Sur ce dernier point, il faut donc disposer de versions récentes de Scratch Desktop (3.6.0) et de Scratch Link (1.2.0), et tout rentre dans l’ordre

Le papa fiston va pouvoir commencer à jouer !

En résumé

  • Scratch Link requiert un récepteur Bluetooth 4.0 pour communiquer avec le Move Hub Lego Boost
  • Le dongle à base de chipset CSR 8510 fonctionne correctement mais
    • Il ne faut pas installer le logiciel « CSR Harmony »
    • Il faut désactiver auparavant l’éventuel périphérique Bluetooth existant
  • Il faut s’assurer d’avoir une version récente de Sratch et Sratch Link

In summary

For english readers:

  • Scratch Link requires Bluetooth 4.0 to communicate with Lego Boost Move Hub
  • CSR8510-based USB dongles works, but
    • Do not install the « CSR Harmony » software : it’s a different bluetooth stack and won’t work with Scratch Link
    • Disable any existing bluetooth receiver (through the BIOS or Windows Device Manager), or you’ll have an error « This device cannot start (code 10) »
  • Use recent versions of Scratch Desktop (3,6,0+) and Scratch Link (1.2.0+) to cope with firmware 2.x changes

Check_MK agent for Esp Easy (updated)

Here is Check_MK agent for ESP Easy.

The ESP Easy firmware can be used to turn the ESP module into an easy multifunction sensor device for Home Automation solutions like Domoticz. Configuration of the ESP Easy is entirely web based, so once you’ve got the firmware loaded, you don’t need any other tool besides a common web browser.

Quick Howto:

Download the agent package from Check_MK Exchange

  • Install the agent.
  • Create a new device in check_mk, with agent type = Check_MK Agent
  • Create a new rule « Individual program call instead of agent access » for this host and set path to
 ~/local/share/check_mk/agents/check_mk_agent.espeasy <IP>

  • Then, create your devices in ESP Easy (an Ultrasonic Sensor for example) :

  • Launch a scan, your sensors will appear, as well as device Uptime and Free RAM:

You can also monitor system values of ESP8266 (RSSI, VCC Value, …) by adding « System Info » devices on EspEasy.

Enjoy !

Update 2020/01 : This agent worked only for ESPeasy 1.x versions. The output format changed with ESPEasy 2.x. The agent version 2.0 now supports ESPEasy 2.x as well as older versions.

Duplicati package for Asustor NAS

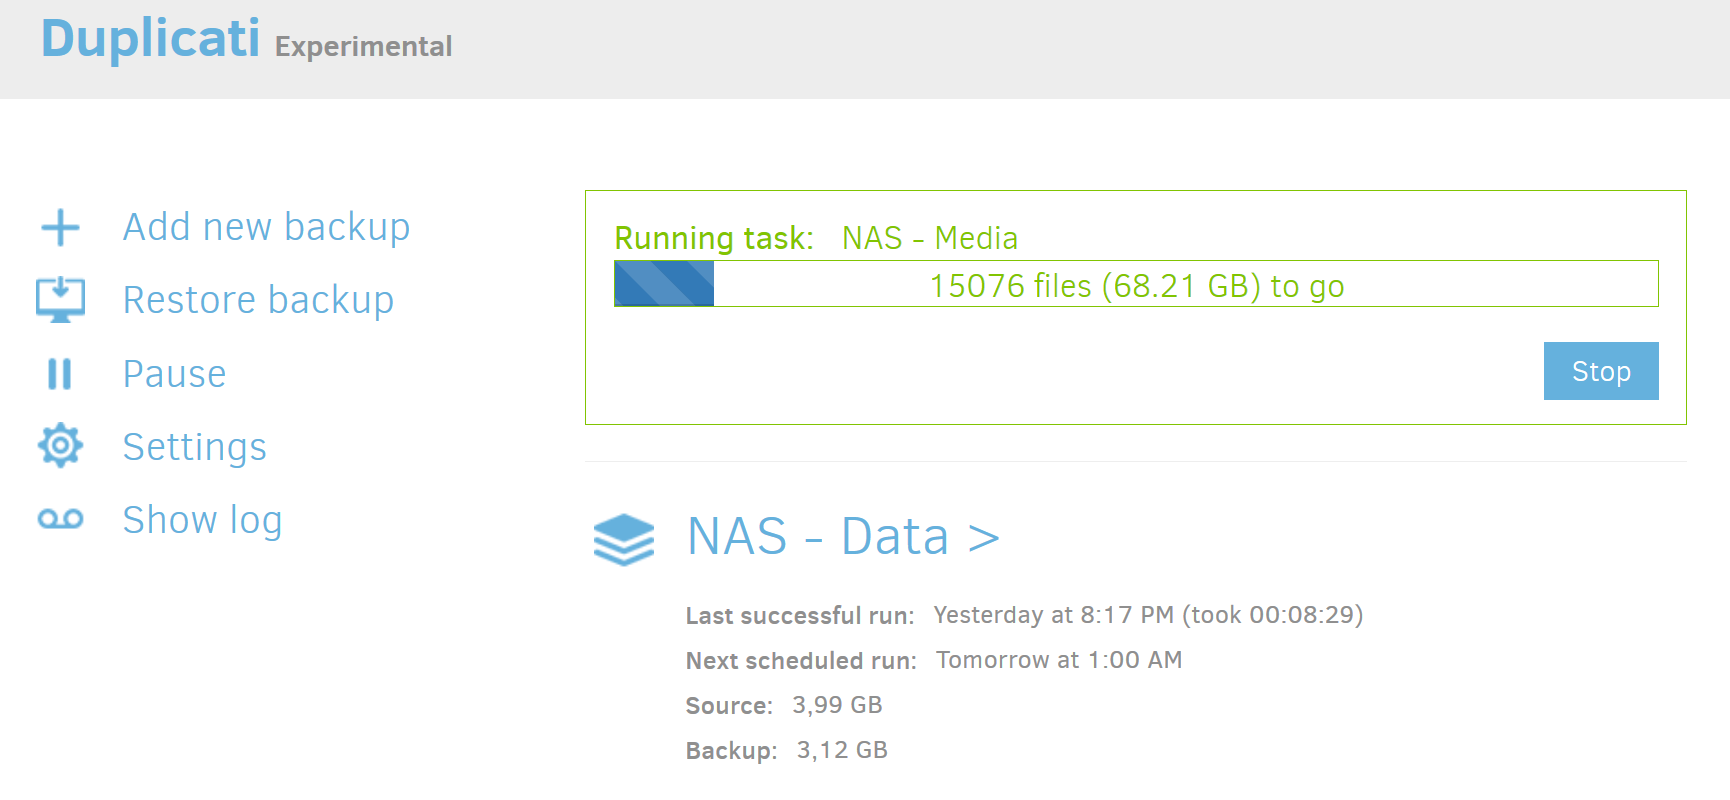
Duplicati is an open source « backup to cloud » software, which allows to backup your data to various cloud platforms, or simply through ftp or ssh.

duplicati-screenshot

I packaged the latest version for my Asustor 3102T NAS, and submitted it for publishing through App Central. Meanwhile, you can download it from here : duplicati_1-1-1_any.apk

Update 14/11/2016: Now available in App Central, in the Beta section.

Have fun !

check-mk « check_pid »

This local check for check_mk is useful with services who won’t start if an old or incorrect pid file remains. I needed to write it because this is the very case of the postfix version embedded with zimbra.

The code is self-explanatory :


#!/bin/bash
# Cyril Pawelko http://www.pawelko.net/check-mk-check_pid/
# Version 1
# Checks if the PID referenced in a PIDFILE exists
# This is a "local" check_mk check for *NIX:
# - Rename it if you need several checks on the same host
# - Copy to check-mk local checks directory (/usr/lib/check_mk_agent/local on Debian)
# - Customize with the PID file path:
PIDFILE="/opt/zimbra/data/postfix/spool/pid/master.pid"

if [ ! -r $PIDFILE ]
 then echo 3 Pid_$PIDFILE - File $PIDFILE cannot be read
 exit
fi

PID=$(cat $PIDFILE  )
PID=${PID//[^0-9]/}
if ps $PID > /dev/null
 then echo 0 Pid_$PIDFILE - Process $PID referenced in $PIDFILE is running
 else echo 2 Pid_$PIDFILE - Process $PID referenced in $PIDFILE does not exist
fi

Download

Have fun !

Arduino remote upload

This is how I upload sketches from my computer (windows 7) to an arduino uno board attached to a remote linux host (Debian 7).

On the linux host:

  • Install usbip package
  • Load kernel modules usbip_host and usbip_core
  • As root, launch usbipd (use -d for debugging)
  • Find your arduino board with lsusb :

Bus 007 Device 001: ID 1d6b:0001 Linux Foundation 1.1 root hub
Bus 008 Device 001: ID 1d6b:0001 Linux Foundation 1.1 root hub
Bus 009 Device 001: ID 1d6b:0001 Linux Foundation 1.1 root hub
Bus 006 Device 002: ID 046d:c313 Logitech, Inc. Internet 350 Keyboard
Bus 007 Device 004: ID 2341:0043 Arduino SA Uno R3 (CDC ACM)

  • Export the usb bus (arduino device is 7-4, so the bus is 7-1)

usbip bind -b 7-1

On Windows:

usbip -a archipel 7-1

  • Let windows install the drivers
  • Use Device Manager to find the COM port corresponding to « Arduino UNO »
  • Select the correct COM port in Arduino IDE
  • Enjoy !

Bluetooth mouse with Doudoulinux

I installed Doudoulinux on my MSI Wind U100’s hard drive for my daughter,

First, I followed this excellent tutorial which tells how to install a basic Debian Squeeze on my hard drive, and install doudoulinux on top of it.

To enable the bluetooth mouse, I followed these steps:

  • Enable bluetooth 😉
  • Install blueman
  • Open a desktop session (« Tout Doudoulinux » in french)
  • Go to settings and open Bluetooth Manager
  • Connect your bluetooth mouse

Et voilà, it’s now enabled at boot for all sessions.

Booting Seatools ISO via pxe

I need to run Seagate diagnostics utility (Seatools), but my computer has no cd reader, no floppy drive, and my disk is so defective that grub won’t boot.

But it has a NIC that supports PXE.

Thanks to http://reboot.pro/8258/ and http://www.isalo.org/wiki.debian-fr/inde(..) I’m able to run these tools via network.

Enter the BIOS, enable network boot.

Boot, write down the mac address.

On another computer (currently a debian squeeze), install a dhcp, pxe, a tftp server and gpxelinux (see the second link above, in french).

Download « Seatools for DOS », it’s an iso image. Rename it to seatools.iso and save it in /srv/tftp

Edit /srv/tftp/pxelinux.cfg/default and create an entry like:

label 1
 MENU LABEL Seatools
 kernel memdisk
 append iso
 initrd /seatools.iso

And voilà ! You can now boot this iso image via pxe.