rpcapd is a deamon that captures traffic on a host, and is able to send it to a remote network sniffer, as ethereal.
It’s included with recent winpcap releases, so running it on windows is very easy : it’s located in C:\program files\winpcap
It’s more tricky for linux : rpcapd should compile and work under linux, but I had to remove parts of windows-related code that prevented correct compilation.
Remote linux sniffer :
Download rpcapd.gz for linux, statically compiled for linux/i386(this version will crash with recent Wireshark releases 1.12+)
- Download from here
- Gunzip and run as root : ./rpcapd -n
Local Windows ethereal :
- Install winpcap 4.0
- Install Wireshark 0.99
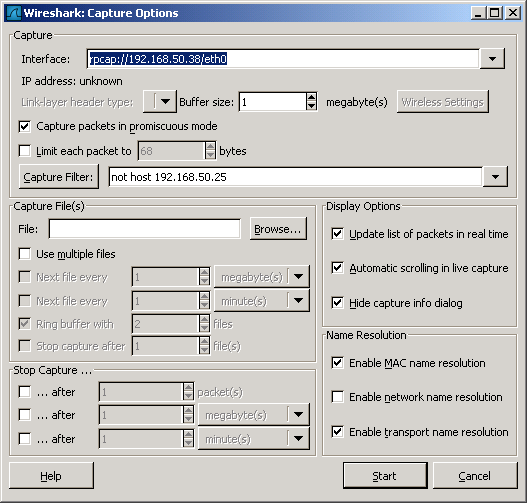
- Go to « Capture Options » and specify remote host : rpcap://remotehost/remoteif
- Start sniffing
It’s a always good idea to use a capture filter to exclude traffic between local and remote host.
Example with windows 192.168.50.25 remotely sniffing from linux 192.168.50.38:
Or, with a recent Wireshark, click « Manage interfaces », add your host and select the desired interfaces.
Update: Do the same without rpcapd
Update 2 : Compile your own version, download for other archs here